Knowledge Base

  • 8" Starbright XLT optics

    Starbright XLT multicoated optics: This advanced optical coatings package includes high reflectivity mirrors of multilayer vacuum-deposited aluminum. The mirror coatings are enhanced with titanium dioxide for maximum reflectivity and overcoated with a protective layer of silicon monoxide (quartz) for long life.

    A unique combination of magnesium fluoride and hafnium dioxide antireflection coatings is vacuum-deposited on both sides of the Schmidt corrector lens for maximum light throughput and contrast. The corrector lens itself is made of high transmission water white float glass instead of the conventional soda lime glass (which has 3.5% lower transmission) used in other telescopes.

    The Starbright XLT multicoatings give you higher light transmission for brighter deep space images and shorter exposure times during CCD and 35mm photography. Across the total visual/photographic spectrum from 400nm to 750nm, independent laboratory tests show the new Starbright XLT coatings are 16% brighter overall than even the original industry-standard Starbright multicoatings. They also visibly increase the contrast on subtle lunar, planetary, and nebula details when compared with a scope with standard multicoatings.

  • 4" Starbright XLT optics

    Starbright XLT multicoated optics: This advanced optical coatings package includes a high reflectivity mirror with multilayer coatings of vacuum-deposited aluminum. The aluminum mirror coatings are enhanced with titanium dioxide for maximum reflectivity and then overcoated with a protective layer of silicon monoxide (quartz) for long life.

    A unique combination of magnesium fluoride and hafnium dioxide antireflection coating materials are used to increase the light transmission through the thick Maksutov meniscus corrector lens. These coatings are vacuum-deposited on both sides of the corrector lens for maximum light throughput and contrast.

    The Starbright XLT multicoatings give you higher light transmission for brighter deep space images, which is particularly important with the limited light-gathering ability of a small aperture scope. Across the total visual/photographic spectrum from 400nm to 750nm, independent laboratory tests show the new Starbright XLT coatings are 16% brighter overall than even the original industry-standard Starbright multicoatings. They also visibly increase the contrast on subtle lunar, planetary, and nebula details when compared with a scope with standard coatings or multicoatings.

  • TV-76 review

        Here are some excerpts about the scope's optical performance from a review of the TV-76 in the September 2002 Astronomy magazine. Concerning double stars and planets, the magazine said "In-and-out-of-focus star tests, star diffraction patterns, and the ability to resolve various double stars reveal the TV 76's top-notch optical quality. If the atmospheric seeing permits, the TV 76 easily resolves doubles with a separation at the theoretical limit of a 76mm aperture scope of 1.6 arc-seconds. Planetary views in the TV 76 are best seen through the higher magnifications offered by the 3mm-6mm Nagler Zoom eyepiece. Jupiter and Saturn reveal subtle color variations and both planets' retinues of moons are visible. When the seeing conditions are good, the TV 76 reveals atmospheric belts on Jupiter beyond the two prominent equatorial belts, as well as Cassini's division in the rings of Saturn."

        About the Moon, the magazine said "The moon seen through the TV 76 is tack-sharp at all magnifications, with no glare or false colors in the view. Stars near the bright limb of the moon are easily picked out because of the absence of glare in the telescope."

        While the 76mm aperture of the TV-76 might make it more a "light cup," rather than the more familiar Dobsonian reflector "light bucket," Astronomy had the following to say about the TV-76 performance outside the solar system. "When used as a rich-field scope for deep-sky viewing, the TV 76 excels. With a long focus eyepiece in the 2-inch diagonal, the scope offers impressive views of "showpiece" objects that are too large in angular diameter to fit into the smaller fields of view of larger telescopes. Under a dark Arizona sky, the Andromeda Galaxy (M31) shows its full 3° extent, including its central dust lanes and two companion galaxies - M32 and NGC 205. Dozens of stars in the Pleiades cluster look like sparkling diamonds scattered on black velvet.

        "The TV 76 'light cup' provides surprisingly good views of large nebular objects. I threaded Lumicon's UHC (Ultra High Contrast) filter into the 'pineapple' eyepiece (i.e. the Nagler 31mm Type 5) and it yielded clear views of the full extents of the North America Nebula and of the Cygnus Loop, a supernova remnant in the summer Milky Way."

        All in all, the Astronomy review called the TeleVue TV-76 "a fine choice for observers who require both high quality and extreme portability."

  • PORTA mount

        While the scope's standard equipment split-ring tube holder/tripod adapter lets you mount the scope on any optional sturdy photo tripod for nature study use, most of the time you will probably mount it on the supplied Vixen/TeleVue PORTA altazimuth mount. The PORTA mount weighs little more than a photo tripod, but is more stable and has convenient manual slow motion controls that you won't find on a camera tripod.

        The premium quality machined aluminum PORTA altazimuth mount has no heavy counterweights to attach, no alignment on the celestial pole to do. Simply install your scope on the supplied adapter plate and slip the plate into the PORTA mount's Vixen-style dovetail slot. Balance the scope fore and aft on the lightweight PORTA mount's altitude axis and start viewing. The split ring design of the tube holder allows your scope to be easily moved fore and aft in the holder to balance the weight of camera or accessories on the PORTA mount.

        The PORTA mount has a newly designed friction clutch system that lets you quickly point your scope towards a target, then track it with the 360° slow-motion controls. There's no need to undo mechanical clutches in order to aim your scope as you have to do when conventional slow motion controls run out of travel before you reach your target. If you want to aim your scope at another part of the sky, simply push it in that direction. The friction clutches disengage and the scope moves freely 360° in any direction. Once you're on or near the target, the slow motion control knobs let you center the object precisely and track it accurately as it moves across the sky or landscape.

        Other brands of scopes can be used on the PORTA mount as well, letting the mount serve a double purpose for you. The PORTA mount has a standard Vixen dovetail mounting slot (with lock and safety screws) that is fully Vixen Sphinx and Great Polaris/Celestron CG5 and Advanced Series dovetail plate-compatible. The dovetail mounting slot can be removed to reveal 1/4"-20 thread and M8-1.25 threaded holes for custom mounting solutions.

        The PORTA mount has slow-motion control knobs of different lengths that can be interchanged so you can arrange them in the configuration that best suits your personal preferences. It comes with tension adjustment and disassembly tools and a built-in tool storage bay. A metal accessory tray holds spare eyepieces and locks the legs in place for stability. The adjustable height aluminum tripod legs have pointed tips for a solid stance on dirt or grass. They can be adjusted to set the height of the centerline of dovetail slot in the mounting plate to between approximately 36" and 56" high for comfortable observing from a seated position.

  • TV-60 reviews

        A review of the TV-60 in the December 2004 Sky & Telescope magazine said, "If you think that size matters and that bigger is always better when it comes to telescopes, think again . . . My first serious use of the TV-60 tested the 'Take Me Everywhere' portability touted by the manufacturer (on a trip to Italy to view Venus Transit of June 2004.) The transit made me realize that the TV-60 just might be the ultimate scope for eclipse chasers . . .
    As I have come to expect from observing with TeleVue's other short-focus apo refractors, the views with the TV-60 are essentially free of false color . . .
    Even at 120x, brilliant Vega, one of the most challenging stars for a refractor to image cleanly, appears as a blue-white Airy disk surrounded by several white diffraction rings and no perceptible color halo . . .
    After many nights of observing, I'm comfortable recommending an upper limit of 180x for the TV-60, which is 75x per inch of aperture. I achieved this magnification with the 2-mm setting on the TeleVue 2-to-4-mm Nagler Zoom eyepiece. It offered exceptional views of binary stars (especially the well-known Double-Double in Lyra) and the Moon . . .
    The pint-sized TV-60 could match the best high-power view I have ever seen in a quality 60-mm f/15 refractor. And the TV-60 could do something those other scopes couldn't: offer a stunning wide-field experience . . .
    With just three eyepieces - the 24mm Panoptic and the 9- and 2.5-mm Naglers - I spent hours wandering the Milky Way from Sagittarius to Cassiopeia."

        A review of the TV-60 on The Telescope Review Web Site on 2/1/04 said, "The scope has impressive optics . . .
    No false color was noted. At only 15X (with a 24 mm Panoptic) Titan could be seen as a tiny pinpoint dot next to the planet. You can see Cassini's Division on Saturn at 70x (with a 5 mm Type 6 Nagler) . . .
    The Trapezium was easily resolved . . .
    Castor is an easy split. Most impressively, the scope split Rigel, again at 70X. On deep sky, you have to make some allowances for the small aperture. M35 is just starting to resolve, but the other nearby clusters (M37, M36, M38) look like similar faint smudges in the eyepiece. Not exciting, but again, we're only talking about a 60 mm telescope here . . .
    I once heard small scopes like this described as "One-Hour Telescopes." You get to see pretty much everything you want to see in about an hour. As such, the TV-60 is a great quick peek or travel scope."

  • TV-85 reviews

        Here are some excerpts from a review of the TV-85 in the September 1998 Sky & Telescope magazine:

        "The TeleVue 85 is a real work of art . . .
    Focusing the TeleVue 85 is truly a pleasure. The high-quality, 2-inch, rack-and-pinion focuser is buttery smooth . . .
    Most of my visual tests were done in early May, when a waxing crescent Moon and a generous amount of haze limited naked-eye stars to 4th magnitude and brighter. The seeing, however, was quite good and ranged between 7 and 9 on a scale of 1 to 10. My tests were made with the scope on either a Losmandy GM8, G11, or a Vixen Super Polaris equatorial mount. All offered stable, vibration-free views.
    One critical visual test of the optics involved checking a bright star's image inside and outside of focus. I did this with a TeleVue 15-mm Panoptic eyepiece used with and without TeleVue's new 5x Powermate "Barlow." In each case the scope showed textbook-perfect star images on both sides of focus, signs of a well-corrected lens.
    Dawes' limit states that an 85-mm objective should resolve double stars separated by as little as 1.3 arcseconds. My first double-star test was Gamma Leonis. This beautiful pair has a 4.4-arcsecond separation and components of magnitude 2.2 and 3.5. It is considered easy for small telescopes. I centered the star using a 35-mm Panoptic eyepiece, which yielded a tack-sharp 17x image. Switching to a 7-mm Nagler upped the magnification to 85x, which easily split the double. I then tried the 15-mm Panoptic and 5x Powermate to obtain 200x. The stars were sharp Airy disks surrounded by extremely clean concentric diffraction rings. A wonderful view!
    My next target was the 4th-magnitude double Gamma Virginis, with a 1.7-arcsecond separation. The stars were easily split at 200x. Pushing further, I tried the 7-mm Nagler with the Powermate for 428x. The stars appeared sharp and clean with perfect Airy disks surrounded by concentric diffraction rings. The only image degradation was due to the seeing, not the optics. Truly awesome! I had the same visual impression, both at 200x and 428x, when I turned the scope to the 1.6-arcsecond double Xi Ursa Majoris. Incredible!
    The tightest double I tried was 35 Comae Berenices. While I was not able to split the 1.1-arcsecond components, at times I felt the star looked elongated.
    While a typical eye can resolve Dawes' limit with as little as 12x per inch of aperture, most observers are more comfortable with 20x to 30x and some even prefer 50x or more. Using the TeleVue 85 at 428x called for a remarkable 125x per inch of aperture! But that's not the end of the story.
    The biggest surprise came while I was viewing Epsilon Boötis, a beautiful blue and yellow, 2.9-arcsecond double. With the star riding high in the east, I fitted my 2.5-mm Vixen Lanthanum eyepiece to the Powermate. This is equivalent to a 0.5-mm eyepiece, yielding a magnification of 1,200x with the TeleVue 85. Before looking into the eyepiece I considered this an act of futility. But the view almost blew me off my chair! When the seeing allowed, the star images had classic diffraction patterns with an obvious dark separation between the rings.
    After the double stars, my next target was the Moon, since I wanted to test the scope for signs of color aberration. If any was present, the Moon's bright limb projected against a dark sky would be where I'd find it.
    The evening was very steady with the nearly first-quarter Moon high in the western sky. I began with the 20-mm Plössl. The 30x view was incredible with the brilliantly lit Moon standing out in sharp contrast against a jet-black sky. There were no signs of internal reflections to degrade the image.
    Upping the power to 40x with the 15-mm Panoptic gave an even better view. Numerous craters along the terminator were razor sharp and the ghostly bluish glow of earthshine was clearly visible, a breathtaking sight. Next I added the Powermate for a 200x tour of the lunar surface. Mountain ranges, rays, rilles, and microscopic craters stood out in sharp, bold relief. For nearly an hour I watched mesmerized as the shadow cast by the rim of Theophilus moved across the crater's floor. Turning to the lunar limb, I could make out just the slightest violet coloring. It was so faint that unless they were specifically looking for it most observers would likely have missed it.
    Deep-sky views with the TeleVue 85 were equally impressive. At 17x with the 35-mm Panoptic, stars in the open cluster M44 shone like diamonds against a dark background. Nevertheless, moonlight and haze prevented pushing the scope to its limits on faint, diffuse objects such as nebulae and galaxies.
    In addition to being a top-rate visual instrument, the TeleVue 85 doubles as a very high quality lens when coupled to the optional field flattener, which increases the focal length slightly to 660 mm (f/7.8). This combination delivers a field about 3° by 2° on 35-mm film, which is perfect for photographing objects such as the Lagoon and Trifid nebulae, the Pleiades, and the Andromeda Galaxy. Photographs made without the field flattener showed elongated star images as little as 1° from the center of the image. With the flattener, however, stars were very much sharper. In my opinion the optional field flattener is a must for those interested in doing serious astrophotography.
    The TeleVue 85mm f/7 APO refractor is truly an incredible instrument with superb, well-corrected optics. The scope's mechanical construction is also first class all the way. Whether you are traveling half way around the world to photograph a total solar eclipse or just casually observing from your backyard, the TeleVue 85 offers today's amateurs an extremely powerful, compact instrument capable of delivering stunning images of the universe around us. This scope is a real gem!"

        Here are some additional excerpts from a review of the TV-85 on Cloudy Nights.com:

        "If you have any interest at all in nature viewing (and of course you do if you like astronomy), you really should have a look through a TV-85. Looking at common birds like Jays and Cardinals is like seeing the bird for the first time. I'm lucky that I live close to Van Cortland Park, where there is a nice mix of woodland and pond environments. It's also very easy to just put the 85 over my shoulder and take it on the train down to Central Park where there is major flyway and migratory route, not to mention many kinds of waterfowl in and around the reservoir. Minutes turn quickly into hours with the TV-85 and a Panoptic eyepiece.
    As for astronomy, the scope is simply a joy to use. I sing in the Met Opera Chorus and getting home late at night after performing some of the great works of Wagner, Verdi, etc. I'm a little wound up! Even a quick half hour session on my roof does wonders for my state of mind. I also have a very nice 6" Dob now, but it's rather inconvenient getting in around mid-night to wait a half-hour or so for the scope to cool down. Of course, that's not an issue with the TV-85. I peck my sleeping wife on the cheek, grab my scope and Telepod and I'm on the roof observing in minutes.
    I just bought the Nagler 3-6mm Zoom and it's a perfect match in the 85. It gives a range of 100-200x and the scope on a steady night can easily handle this on the moon and planets and of course, doubles. Jupiter's Red Spot and 4 clear bands are the norm. The first time I saw a shadow transit on Jupiter, it looked like the Almighty had put a crisp, black dot on the planet's surface with a huge fine-point marker! Saturn is absolutely gorgeous with the Cassini Division a crsip, black line available totally circling the planet at the moment. I've seen 4 moons with direct vision.
    Looking at the brighter clusters and nebula in a Panoptic is something I'll never tire of. M45, M44, M35, M36 and others have that almost 3-D quality to the image. The Double Cluster is spectacular with stars everywhere and great color contrast. The Trapezium is easily resolved even at 32x and the stars are crisp points of light suspended in the gas cloud. Amazingly, the TV-85 reveals as much of the gas cloud as does my 6" Dob. Contrast does matter after all! At 75x, I've clearly seen the E star in the Trapezium and I'm sure on a good night I can get the F star as well, though maybe not at that power. Rigel's companion shows up clearly at 75x as well and all 4 components of Sigma Orionis are easy. The Winter Albireo is stunning with great color contrast. I can't wait for the real thing in summer! The comet Ikea-Zhang is a spectacular sight now even in binoculars, so I don't have to say how great it looks in the TV-85. But it's gorgeous. Please make it a point to try and see this comet as it continues to brighten. I can see that I'll be getting a serious lunar atlas, because the amount of detail that I can see even on the 5 day old moon is stunning. I'll be counting craterlets in Plato this weekend in the Nagler Zoom!
    I could go on, but you get the gist. I'm very, very pleased with this telescope. It has fantastic optics, it's very portable and versatile as far as mounts and accessories, and 85mm is a nice amount of aperture for the majority of observing that most amateurs engage in. I'm aware that the price of the TV-85 is not unsubstantial, but I can honestly say that not once have I thought about that when I'm at the eyepiece. I'd be willing to bet you won't either!
    Oh yeah, did I mention that Castor at 200x looks like a pick-up truck's headlights coming at you on a country road at midnight?"

  • NexStar 4/5 computer with SkyAlign

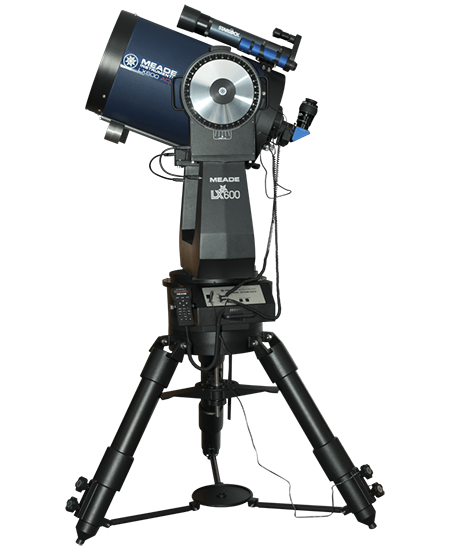
        The NexStar computer hand control has a built-in database of nearly 40,000 stars, deep space objects, and solar system objects it can locate for you. The computer's memory contains the following objects:

    • the entire RNGC (Revised New General Catalog) of 7840 nebulas, galaxies, and star clusters

    • the Messier Catalog of the 110 best known deep sky objects

    • the Caldwell Catalog of 109 fascinating objects that Messier missed

    • 29,500 selected SAO stars, including variable stars and multiple star systems.

        Also included are the eight major planets out to Pluto, as well as the Moon, for a total database of nearly 40,000 stars and objects. It's enough fascinating objects to keep you busy observing for the rest of your life.

        You can also store and edit the right ascension and declination of up to 200 objects of your own choosing, such as the comet and asteroid coordinates published monthly in Astronomy and Sky & Telescope magazines. The computer control can quickly find any of those objects at your command, and track them with high accuracy for visual observing or casual astrophotography.

        A review in Sky & Telescope magazine commented, "To quantify the Go To pointing accuracy, I spent several nights slewing to 50 objects selected from the NexStar's database. About one-third of them ended up dead center in the field, another third landed within ½° of the center, and the remaining third were within 1° of the center."

        All of the database and scope operation information is displayed on a double line, 16-character, red-illuminated liquid crystal display on the hand control. This display leads you through the steps necessary to line up the scope on the sky, locate objects, control scope functions like the brightness of the hand control display, and much more. It shows you basic information about the object being viewed (such as the object's name, catalog designation, type, magnitude, and so forth). In addition to this basic information, there is enhanced information on over 200 of the most note-worthy objects. When it's not displaying menus or object information, the display also shows you the constantly updated right ascension and declination coordinates at which the scope is aimed.

        The Sky & Telescope review said, "After using several NexStar-equipped telescopes in recent years, I can attest to the quality of the software and hardware for Celestron's Go To system. The package is reliable and offers quick access to an excellent array of databases. I especially like Celestron's Tour mode, which steps a user through an eclectic choice of deep-sky objects, quirky asterisms, and fine double stars, the latter being a class of objects great for urban observing that many Go To systems ignore. Using NexStar scopes, I've been introduced to many fine double stars."

        There are 19 fiber optic backlit LED buttons that glow a soft red in the dark to make it easy for you to control the computer without affecting your dark-adapted vision. An RS-232 communication port on the hand control allows you to operate the telescope remotely via a personal computer, using the supplied RS-232 cable and CD-ROM that contains Celestron's NexRemote control software program.

        NexRemote provides an on-screen image of the computer hand control with full control of all the hand control functions from your computer keyboard. In addition to emulating the NexStar hand control, NexRemote adds powerful new features that let you keep your eyes on the stars instead of the hand control. It provides talking computer speech support using your computer's built-in speaker; lets you control the objects you want to see and the order in which you see them; lets you create and save custom sky tours; lets you take wireless control of the telescope with optional gamepad support; lets you connect your personal GPS device to the NexRemote; downloads NexRemote updates online to use the latest features; lets you download software upgrades to your NexStar computer at no charge from Celestron's website via the Internet; lets you use third-party planetarium programs to control the scope; and more.

        The Sky & Telescope review said, "The author tried Windows and Mac programs, including Desktop Universe, ECU, MegaStar, SkyMap Pro, Starry Night, and TheSky, and all controlled the mount without any problems." The telescope comes with a CD-ROM of TheSky Level 1 planetarium and star charting software. This Windows-based program will let explore the Universe on your PC and print out custom star charts of the sky to help you find faint objects that are not in the scope computer's database.

        A high precision pointing subroutine ("precise go-to") in the computer lets you point accurately at objects that you want to photograph that are too dim to be seen though the scope. Built-in programmable permanent periodic error correction allows sharper astrophotographic images, with fewer guiding corrections needed during long exposure photos through scopes with enough aperture to make such imaging practicable. Built-in adjustable backlash compensation permits precise corrections during astrophotography and when observing visually at high powers.

        The operation of the NexStar with SkyAlign is simplicity itself. You don't have to level the scope or point it north with SkyAlign, or even know Polaris from the Pleiades. After turning on the scope, enter the date and time and your location. The scope's computer will remember up to ten different observing sites for you to choose from, and will automatically default to your last observing site (very helpful if you invariably observe from one location, such as your back yard). Then, simply point the scope at any three bright stars, or at two bright stars and a planet or the Moon (you don't even have to know which stars and planet you're looking at, and you don't have to know and locate specific stars as you do with other alignment programs). Using the scope's hand control, center the stars in the finderscope crosshairs.

        The NexStar SkyAlign computer system automatically determines which objects were chosen and generates an internal map of the sky that it uses to guide its automatic moves to any star or object you select for the rest of the night. It does it by calculating the angles and distances between the objects you've chosen and compares them to the known separations between objects. Using this method, the telescope determines what objects were chosen. The display tells you which three objects you aligned to for confirmation.

        Only two of the alignment objects will actually be used for calculating the model of the sky that the computer uses for locating objects. The third object simply provides a positive identification of the other two. Therefore, at least two of the three alignment objects should be spaced at least 60 degrees apart in the sky if possible, and the third object should not fall in a straight line between the first two alignment stars.

        Since the brightest stars appear first as the sky darkens at dusk, the SkyAlign system is exceptionally easy to set up and use as night comes on. You don't have to guess which stars are brightest, as only the brightest will be visible in the early evening. The same holds true for observers from a light-polluted suburban site, where only the brightest stars are visible to the unaided eye.

        Several additional alignment methods are built into the NexStar computer - auto two-star alignment, manual two-star alignment, solar system alignment for daytime observing, and a one-star manual alignment - allowing you to choose a level of computer accuracy in automatically finding objects with which you are comfortable. If you're more familiar with the sky, you can use the new Auto Two-Star Align method. Enter the date, time, and the latitude and longitude of your observing location into the hand control. If you don't know your latitude and longitude or can't determine them from the grid lines on your state's road map, you can use the coordinates of the nearest city from the list of hundreds in the instruction manual. The scope will keep up to ten observing locations stored in its memory (backyard, vacation home, favorite dark sky site, etc.), so you only have to enter the latitude and longitude once.

        Next, align the scope manually on a single bright star from a list of 40 in its memory. The NexStar will then automatically choose and slew to a second alignment star. Check to be sure the second star is centered in the telescope eyepiece and that's it. You've aligned the scope on the sky, ready for a night's go-to observing.

        In addition to moving the scope to any of the 40,000 objects in its memory and tracking the object while you observe, the computer is loaded with useful features. It has user-defined slew limits, which prevent the scope from moving to objects below any horizon that you define. That makes it ideal for observing locations that have the normal horizon view blocked by houses or trees. The computer has a hibernate mode that lets you power down the scope without losing your astronomical alignment. This feature allows you to find planets in the daytime after aligning the scope the night before. The computer has a wedge align program that helps aligns the scope on the celestial pole when you're using a tripod and wedge for long exposure astrophotography.

        Once the scope has aligned itself with the sky, it takes only a few keystrokes on the computer hand control to have the scope move automatically to your night's first observing target and start tracking it so you can observe at your leisure. You can find hundreds of fascinating deep space objects your first night out, even if you have never used a telescope before. No matter what level of experience you start from, your NexStar SkyAlign scope will unfold all the wonders of the Universe for you, your family, and your friends.

        If you're using an optional equatorial wedge to polar align the scope for long exposure astrophotography, two polar alignment programs in the scope's computer (one for the Northern hemisphere and one for the Southern hemisphere) make quick work of accurate alignment on the appropriate celestial pole. SkyAlign does not work in the equatorial mode.

        You can click on the link below to download a brief RealPlayer movie showing how quick and easy it is to line up your scope on the sky with SkyAlign. There is also a link to download RealPlayer for free if your PC does not already have the program.


  • Single-Shot Color

    Individual pixels in CCD cameras record only light and dark, black and white. They
    don't see color. To produce a color image requires taking three separate monochrome
    (black and white) images though individual red, green, and blue filters. These three
    black and white images, each representing a single color of light (red, green, or
    blue), are then combined in your computer to produce the final full-color image.

    Most CCD cameras take the three filtered images sequentially and store them in the
    computer for later processing, with the operator changing color filters between
    each exposure. However, several CCD manufacturers offer single-shot color cameras
    that record all three color images at the same time, in a single exposure. These
    cameras are also available in conventional monochrome versions. The single-shot
    color CCD cameras are essentially identical to their monochrome counterparts with
    the exception of the addition of a permanent color filter matrix over the pixels
    that lets them take all three color images simultaneously, as explained below.

    The images in the box above show the basic structure of the pixels on a Kodak CCD
    detector, such as used on high-end SBIG and Finger Lakes Instrumentation single-shot
    color cameras. The top row shows a monochrome detector, the bottom row shows a single-shot
    color detector. The center image in each row is an actual photograph of the surface
    of the CCD showing a small section of the pixel array. The drawings at the right
    depict a side view of an individual pixel.

    As you can see from the bottom row of images, the CCD structure for the single-shot
    color version is the same as the monochrome version except for the red, green, and
    blue pattern of filters over the pixels. The arrangement of colored filters over
    the pixels in a single-shot color camera is a repeating square of RGGB known as
    a Bayer pattern. This repeating pattern of RGGB pixels allows the separate red,
    green and blue data to be collected in a single monochrome exposure and electronically
    separated into the three monochrome images your computer needs to reconstruct a
    full-color image. Every fourth pixel sees red, every fourth pixel sees blue and
    every other pixel sees green. Special software extrapolates the RGB color data for
    each individual pixel in the frame from the color information in the adjacent colored
    pixels.

    Many of the more economical cameras from Celestron, Meade, and Orion use Sony CCD
    detectors primarily designed for general use in camcorders and other consumer electronics,
    rather than the more-specialized detectors from Kodak. The Sony detectors use a
    color filter matrix of yellow, cyan, magenta, and green filters in a repeating sequence
    to generate the full color spectrum using sophisticated addition and subtraction
    algorithms to generate the desired RBG signal. The Sony filter matrix pattern is
    shown below.

    What are the differences between taking three separate exposures versus one? Primarily
    it is a trade-off between greater complexity, sensitivity, and flexibility at a
    higher cost for the monochrome camera versus the single-shot color camera's simplicity,
    ease of use, and lower overall cost for color imaging. A single-shot color camera
    needs only one image to do the job of the three needed by a monochrome camera/color
    filter wheel system. While this is simpler and less time-consuming, it results in
    a difference in the amount and quality of data recorded by each camera. The final
    image from a single-shot color camera has the same number of total pixels as a color
    image created by a monochrome camera and external filters, but it is created from
    less original data than the three discrete images of a monochrome camera. In addition,
    only one-third of the color information for each pixel is unique to that pixel and
    measured directly. The other two color values are approximations, derived from adjacent
    pixels.

    In the case of a monochrome camera, the external color filters can be designed specifically
    for astronomical use, with high light transmission, precisely tailored response
    curves, and with better control of the color balance between the emission line and
    continuum light for different deep space objects. There is no way to tailor the
    sensitivity and spectral response of each color filter in the matrix to match the
    emissions of the object you are imaging, or to use special purpose narrowband filters,
    such as Oxygen III, SII ionized sulfur, H-alpha, etc. The matrix filters are general
    purpose red, green, and blue filters only.

    As far as sensitivity is concerned, the monochrome camera is somewhat more sensitive
    due mainly to the nature of the external filters compared to the micro-filters placed
    over each pixel in the single-shot color camera. The monochrome camera requires
    more work to take a tri-color image, however, and the addition of the required filters
    and color filter wheel makes it more expensive.

    The effective QE (quantum efficiency) of the monochrome camera with external filters
    is slightly higher than the single-shot color camera based on the filter transmission
    characteristics. But remember, the monochrome camera must take three frames versus
    the single-shot color camera's single frame. So for a proper comparison, a monochrome
    camera taking a 20 minute image through each of the three filters should be compared
    to a single-shot color camera taking a single 60 minute image. In this case, the
    single-shot color camera compares very well to its monochrome counterpart. Moreover,
    self-guiding the single-shot color camera is easier due to the fact that the separate
    built-in guider detector is never covered by a filter which can affect the tracking
    performance of the guider. Where a monochrome camera shines is in taking a grayscale
    image, or in taking narrow band monochrome or tri-color images of emission line
    objects. But for simple color images, single-shot color cameras are very capable.

  • Interline CCD

    An interline-transfer CCD detector has a parallel register consisting of columns of sensors (photosites or pixels) separated by opaque strips (interline masks). The photons of the image accumulate in the exposed sensor area of the CCD detector.

    Unlike conventional CCD cameras, which use a mechanical shutter to keep light from falling on the detector while the accumulated charge is being read out sequentially from the detector to your computer, the interline detector uses an electronic "shutter." During CCD readout the entire image is first electronically shifted from the sensor columns into shift register columns hidden under the interline masks between each row of pixels. All of the columns shift simultaneously from sensors to shift registers, rather than transferring sequentially, as with a conventional CCD. Readout then proceeds from the hidden shift register columns sequentially to your computer in normal CCD fashion while the now-empty sensor areas start to accumulate more photons.

    Since the signal is transferred in microseconds, electronic pixel smearing during download (from photons continuing to be recorded while the pixel is being read) is undetectable for typical exposures. The rapid transfer also allows the interline CCD to act as an electronic shutter to permit very short, very accurate exposures for lunar and planetary imaging.

    A drawback to interline-transfer CCDs has been their relatively poor sensitivity to photons, since a large portion of each pixel is covered by the opaque interline mask. Kodak interline CCDs use a microlens assembly over the pixel array to direct the light from a larger area down to each photosite to focus more of the incoming light on the individual pixels.

  • Microlens

    In
    order to increase the light-gathering efficiency of a CCD camera, some CCD detectors
    use a microlens array over the imaging detector to gather and focus more of the
    incoming light onto the individual pixels.

    Each photosite (picture element or "pixel") is surrounded by an opaque mask covering
    the shift registers and circuitry necessary to read out the image signal gathered
    by the camera. This means that some of the light falling on the detector lands on
    the detector's mechanical structure rather than the light-gathering portion and
    is lost. This is shown by the green arrows in the illustration.

    The microlens system is an array of tiny clear plastic lenses placed over the CCD
    detector so that a single miniature lens is situated over each pixel. These lenses
    bend the incoming light rays so that the light that would normally be lost on the
    CCD structure is directed instead towards the photosite, where it is recorded as
    part of the image. These deflected rays are shown by the red lines in the illustration.
    The microlens system markedly improves the light gathering efficiency of each pixel
    by putting to use incoming light that would otherwise be wasted.

Items 41 to 50 of 82 total